 |
 |
MLPI-MotionLogicProgrammingInterface(mlpi4Java)
1.26.2
|
This manual shows how to set up a Java project with Android Studio running on Android smart devices which uses the MLPI to communicate with the target device.
Android Studio is the new development IDE for Android based devices. It is the successor of the ADT which was based on Eclipse IDE.
To start programming in Java, you need a working Java environment. By default, this includes:
The Java downloads can be found by courtesy of oracle: http://www.oracle.com/technetwork/java/javase/downloads/index.html. Android Studio can be downloaded at https://developer.android.com/sdk/index.html. For all downloads and informations regarding Android app development, it is recommended to have a look at http://developer.android.com/. There, you can find detailed instructions and articles how to program and develop for the Android platform.
Start by creating a new "Android Application Project" in your workspace:
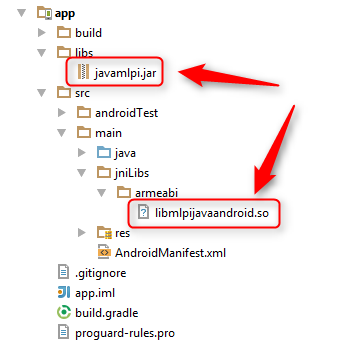
To use the MLPI in Java, you need to add the javamlpi.jar library which can be found in the folder mlpi4Java/lib of the MLPI-SDK. Add the MLPI to an existing project, by just dragging and dropping the javamlpi.jar from the lib folder of the mlpi4Java Toolbox to your project root libs folder in the Package Explorer of your Android Studio project.
Next, add a folder armeabi in the src folder and drag and drop the file libmlpijavaandroid.so from the folder mlpi4Java/bin/... to it.
After that, your project structure should look like in the image below. Make sure, that all folder names match.
For the next step you should add the necessary permissions for your application to communicate via network to the manifest of your project. Therefore, open the file AndroidManifest.xml and add the following lines in front of the <application> node.
With these steps taken you should now be able to start using MLPI classes from your Android environment.
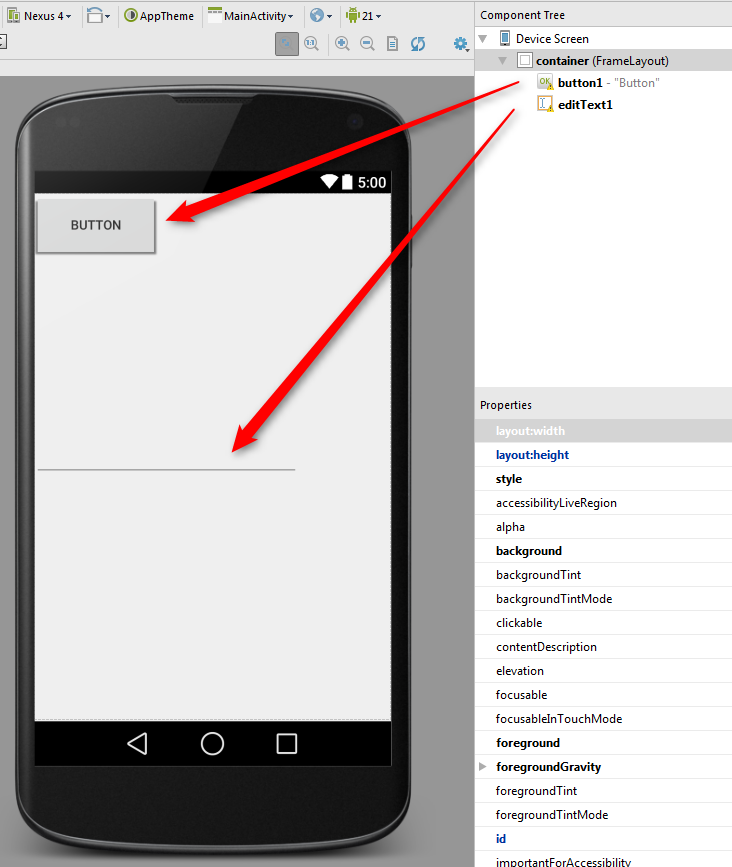
Add a button and a text box to your layout. We want to connect to a device, when pressing the button and print the device name to the text box.
Now, insert the following MLPI code to the corresponding activity class (e.g. MainActivity.java).
Click "Run" to start your application. Happy coding...

